How to Fix a Leaking Faucet?
Fixing
a faucet in an RV is almost similar to that in the home. Since most of the
plumbing pipes in RVs are plastic, usually no tools are required as the faucet
can be easily unscrewed using your hands. Before embarking on repairing or
replacing a new faucet, just as in a house, turn off the primary water source
in your RV. This is usually from the freshwater tank.
The
solution to this problem is to remove and replace the cartridge inside the
faucet.
Materials Needed
1. Adjustable wrench
2. New cartridge
3. Cartridge puller
4. Handle puller
5. Pocket knife or awl
6. Flat head screwdrivers
7. Towel
Procedure
1. Shut off the water supply.
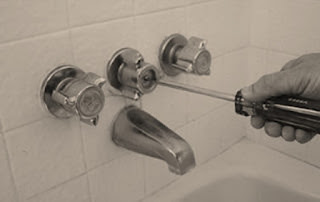
2. With a little pressure, use
an awl or pocketknife to remove the handle cap that's in the middle of the
shower faucet. A screw should be visible now.
3. Use the screwdriver to
remove the handle screw. If the handle cannot come off easily, use a handle
puller.
4. Use a screwdriver to pull
out the retaining clip that rests on top of the cartridge. The clip looks like
a small horseshoe.
5. Remove the washer that's
fixed around the middle of the cartridge. Unfasten the nut and hex screw with
your wrench.
6. Pull out the cartridge with
your pliers. Replace it with a new cartridge whose model is exactly like the
one you have removed. Follow the instructions carefully to align the new
cartridge correctly.
7. Turn on your shower and
check if there are any leaks.
Please note you have done all you could to
fix your leaking showerhead. If it continues to leak, then you can call in a
professional plumber.


No comments:
Post a Comment